Setting up a Multi-function device to scan to email via Office 365 is easy. This Microsoft document lists the three possible methods, which are:
- SMTP Client Submission
- Direct Send
- Using an SMTP Relay
Which method you should use depends on your environment. If you already have an SMTP server configured internally, using SMTP relay may suit you better.
This post will cover the SMTP Client Submission method. The disadvantage of this method is that it requires the printer to use a licensed Office 365 account. But it is very easy to setup.
Setup scan to email from a HP Multi-function Device
I am going to demonstrate using a HP PageWide Pro 477dw MFP, but the same method will work for any brand. Before you begin configuring the printer, make sure you know the username and password of the Office 365 account you are going to use.
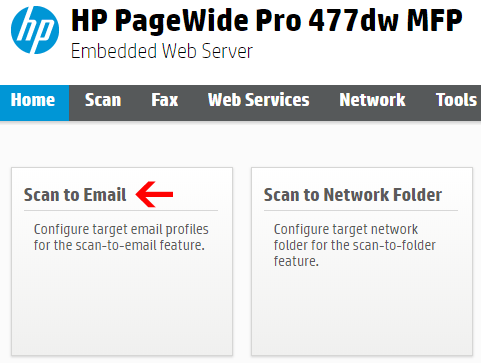
- Login to the printers web interface.
- Find the “Scan to Email” options:

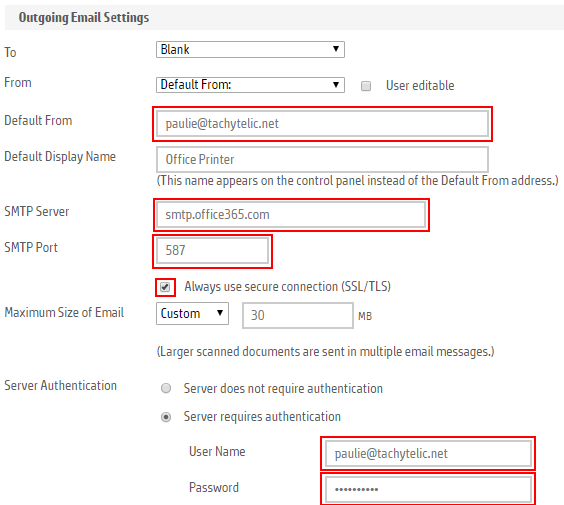
- Now you need to enter the following:
- From Address: Use the Office 365 Account Email Address you want to use for the printer
- SMTP Server: smtp.office365.com
- SMTP Port: 587
- Tick the box that says “Always use secure connection (SSL/TLS)”
- Username: Use the Office 365 Account Email Address you want to use for the printer
- Password: Enter the password for the account you want to use.

- Scan a document!