Apart from the Native External Email Warning, you can create a mail flow rule that adds a disclaimer at the top of every incoming message. Unlike the previous method, creating a mail flow rule to implement the external email warning is more customizable.
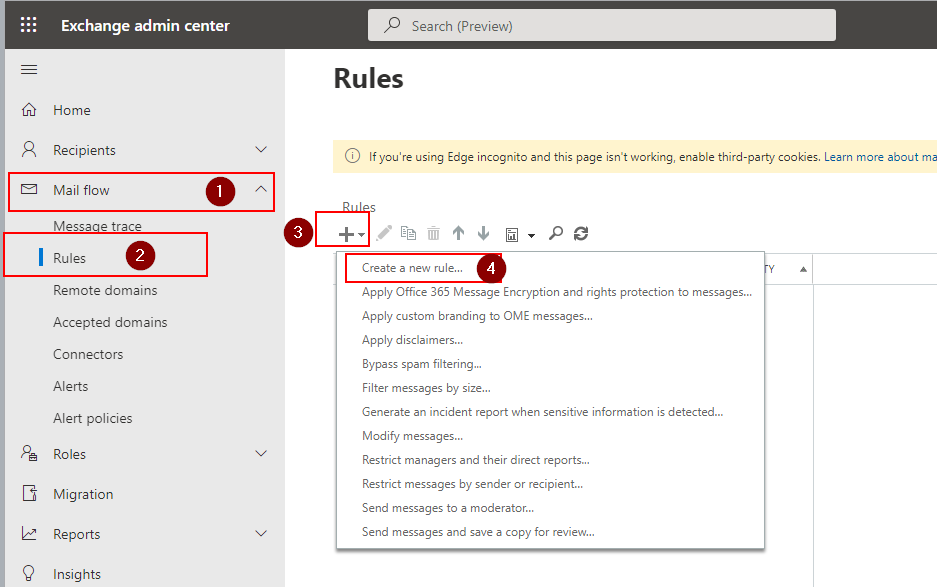
1. Open your favorite browser and navigate to the Exchange Admin Center.
2. Click through (1) Mail Flow, (2) Rules, click the (3) + sign, and select (4) Create a new rule.
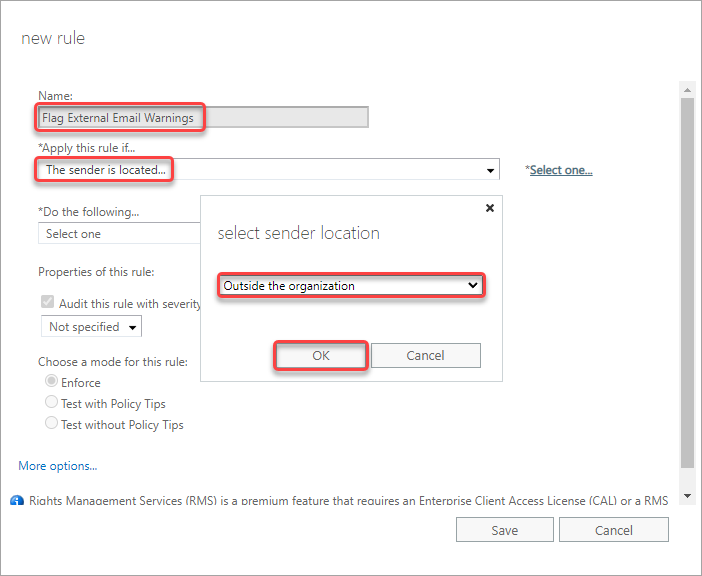
3. Give your rule a sensible name, such as Flag External Email Warnings.
Under the Apply this rule if, choose the sender is located, select Outside the organization, and OK.
4. Next, click the More options link to reveal more configuration options.

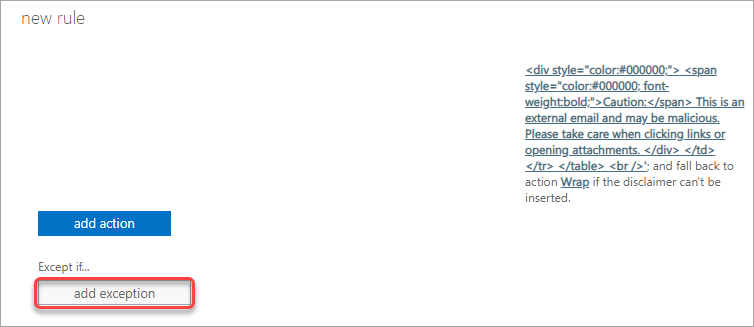
5. Under Do the following, select the Apply a disclaimer to the message → prepend a disclaimer.

6. Click the Enter text link. Paste the code below into the specify disclaimer text box that appears, and click OK.
<!-- Red Banner -->
<table border=0 cellspacing=0 cellpadding=0 align="left" width="100%">  <tr>    <td style="background:#ff0000;padding:5pt 2pt 5pt 2pt"></td>
    <td width="100%" cellpadding="7px 6px 7px 15px" style="background:#ff000;padding:5pt 4pt 5pt 12pt;word-wrap:break-word">      <div style="color:#000000;">        <span style="color:#000000; font-weight:bold;">Caution:</span>        This is an external email and may be malicious. Please take care when clicking links or opening attachments.      </div>    </td>  </tr>
</table>
<br />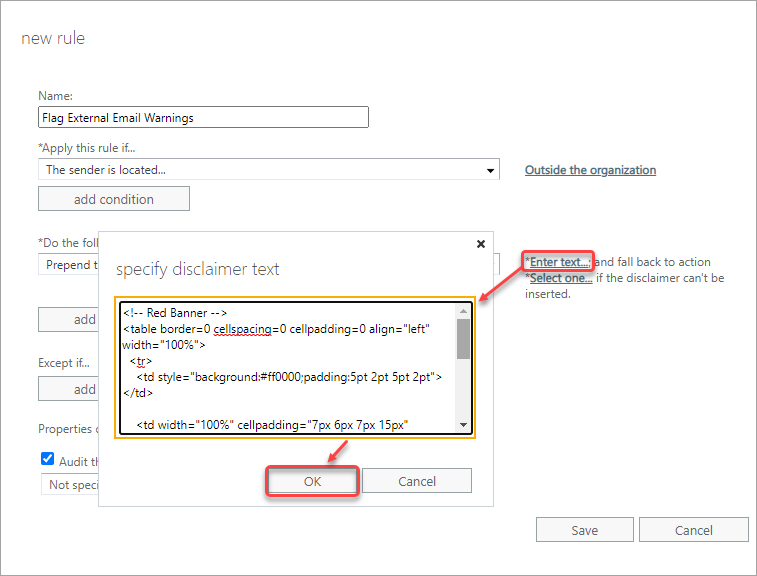
7. Click the Select one link, choose Wrap, and click OK.

8. Click the add exception button.
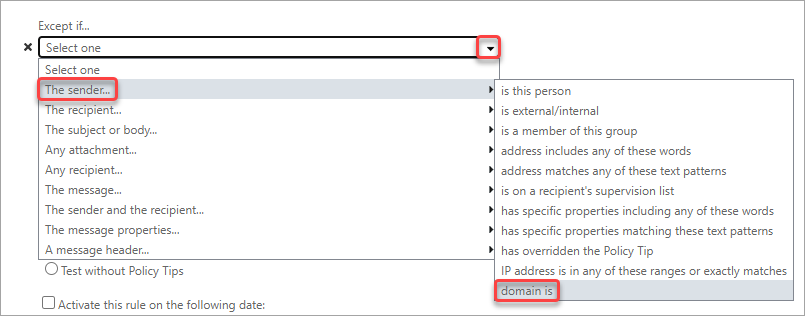
9. Click the dropdown box under Except If, select The Sender → domain is.
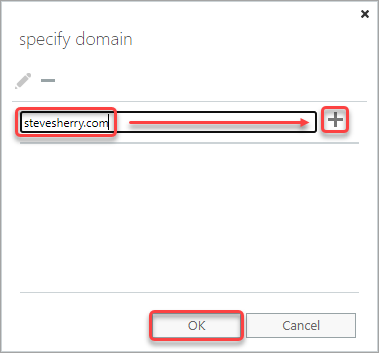
10. Type the domain name of your trusted domain and click the + sign to add it to the list. Repeat the same step to add more domains as needed. Click OK to save.
11. Finally, click Save to save and close this new rule.

12. Finally, confirm that the rule is enabled by finding a checkmark next to the rule name.

Note: Exchange Online applies the transport rules based on priority, where the smallest number (0) has the highest priority. Make sure to consider the prioritization when you have multiple mail flow rules.
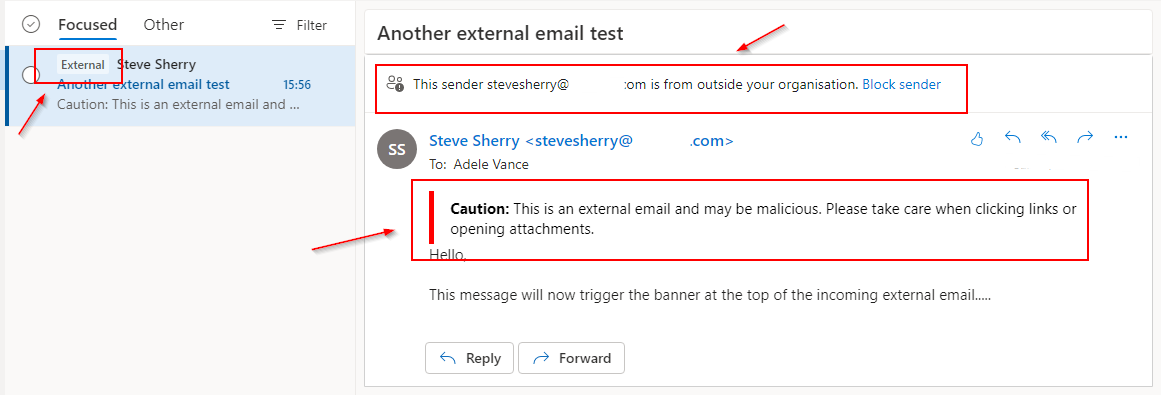
Testing the Mail Flow Rule External Email Warning
The rule you created takes effect after a few minutes, so you can start testing the rule not long after.
Now, send an email from your external sender to your internal user. Open the email, and you should see the custom external email warning banner before the message body, as shown below.