Gmail supports Microsoft® Office 365 and Exchange ActiveSync accounts, and comes pre-installed on all Android devices. To add your Microsoft® Office 365 or Exchange ActiveSync account to Gmail:
- Open your device's Settings app. Tap Accounts. If you can't see 'Accounts', tap Users & accounts.
- At the bottom, tap Add account.
- Tap Exchange.
- Enter your Microsoft® Office 365 or Exchange ActiveSync email and credentials.
After you add your account to Gmail, you may be prompted to set up a password via the Mobile device mailbox policies if your IT admin requires it.
If your organization uses a different email client, consult your email client's documentation to determine whether it supports Microsoft® Office 365 and Exchange ActiveSync accounts and to learn how to set up your account.
General information
- You can find all settings here:
- Administrators: CONTROL PANEL > Home > ActiveSync
- Users: My Services > ActiveSync. Read the Knowledge Base article Where Can I Find ActiveSync Settings For My Wireless Device? for more information.
- For all Android devices, you may use the following ActiveSync settings depending on the model:
- Server Name: Type in the Exchange Proxy Server. You can find the server address in CONTROL PANEL > Services > Mailboxes > Mobile > ActiveSync
- Username: The username
- Domain Name: Leave blank
- Username: Enter full email address
- Domain\Username: Enter the Exchange domain and a Canonical username together in this field, or enter full email address Note: Exchange domain and Canonical username can be found under Users > click on Display Name of the user > Exchange > ActiveSync.
Gmail app set up
Note: most of the Android devices have default Gmail app installed.
To connect default Gmail app, use the following settings:
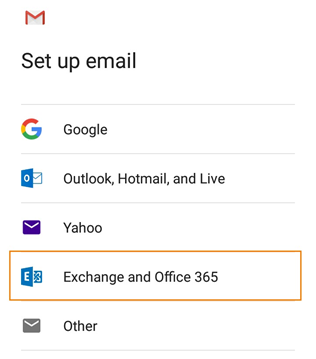
- Select Exchange > click Exchange and Office 365
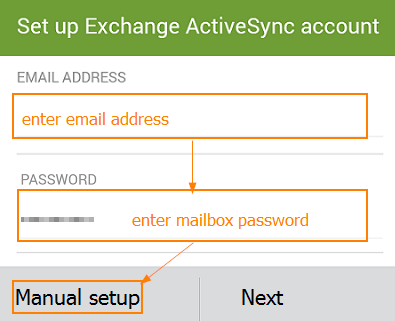
2. Type in your primary email address and your password.
Note: If you have an Autodiscover record compatible with Exchange server set up, tap Next, and your email account settings automatically. If the settings are populated incorrectly or you do not have that record, tap Manual setup.
Type in the settings. You can find all the settings here:
- Administrators: CONTROL PANEL > Home > ActiveSync
- Users: My Services > ActiveSync. Read the Knowledge Base article for more information.
- Username: type in your primary email address.
- Password: mailbox password.
- Client certificate: None
- Server Name: Type in the Exchange Proxy Server. You can find the server address in CONTROL PANEL > Services > Mailboxes > Mobile > ActiveSync
- Port: 443
- Use Secure connection: SSL/TLS
- Click Next.
- Accept the security prompt.
- Change synchronization scope (YOUR COMPANY does not recommend to synchronize all the data for big mailboxes).
Set the account as default one if you want it to be your reply from the account.
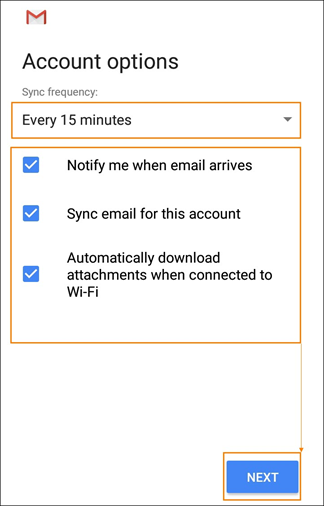
- Provide the description for the account (optional).
- Finish the setup by tapping on Next
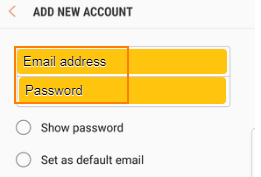
On some Android devices there are only two fields for setting up an Exchange account: Email address and Password. Use the following settings to set up the account:
- Email address: User_Name@ServerAddress(correct settings can be found in CONTROL PANEL or My Services under Services > Home > ActiveSync)
- Password: your mailbox password
- Tap Add Account
Enter the Server address in the new field that will appear and change the Email address field to your primary email address. Tap Next to finish the setup.
Note: if the 'Cannot connect to the server' error comes up during configuration, try to switch from Wi-Fi to your mobile network or vice versa.
Read the Knowledge Base article for common ActiveSync issues on Android-powered devices.
Native app set up
Below you will find the instructions to connect native app for some Android devices to Exchange server:
- Samsung
- HTC
Samsung
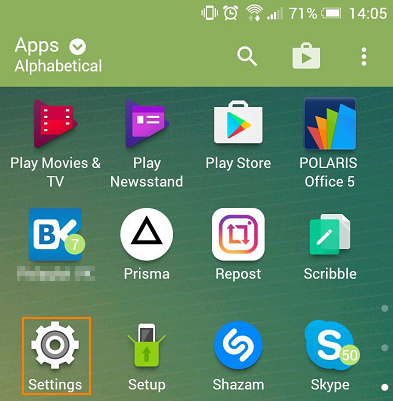
- Open Application drawer from the Home screen by swiping up and tap Settings.
- Tap Add Account.
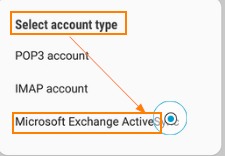
- Choose Microsoft Exchange ActiveSync.
Type in your primary email address and your password.
Note: If you have an Autodiscover record compatible with Exchange server set up, tap Next, and your email account settings automatically. If the settings are populated incorrectly or you do not have that record, tap Manual setup.
4. Type in the settings. You can find all the settings here:
- Email address:type in your email address
- Domain\Username:type in EXCH domain\Canonical user name
Note: This can be found under Users > click on Display Name of the user > Exchange > ActiveSync - Password: mailbox password
- Exchange server:Type in the Exchange Proxy Server. You can find the server address in CONTROL PANEL > Services > Mailboxes > Mobile > ActiveSync
- Use Secure connection (SSL):checked
Use client certificate: not checked
- Administrators: CONTROL PANEL >Home > Exchange Servers and Settings
- Users: My Services > ActiveSync. Read the Knowledge Base article for more information.
6. Click Next.
7. Accept the security prompt.
HTC
- From the Home Screen select Settings.
2. Choose Accounts & sync > selectAdd Account
3. Choose Exchange ActiveSync for HTC.
4. Type in your primary email address and your password.
Note: If you have an Autodiscover record compatible with Exchange server set up, tap Next, and your email account settings automatically. If the settings are populated incorrectly or you do not have that record, tap Manual setup.
5. Type in the settings. You can find all the settings here:
- Administrators: CONTROL PANEL >Home > ActiveSync
- Users: My Services > ActiveSync. Read the Knowledge Base article for more information.
- Domain: leave the field blank
- Username:type in your primary email address
- Password: mailbox password
- Server Name: Type in the Exchange Proxy Server. You can find the server address in CONTROL PANEL > Services > Mailboxes > Mobile > ActiveSync
Pixel
- Open Application drawer from the Home screen by swiping up and tap Settings
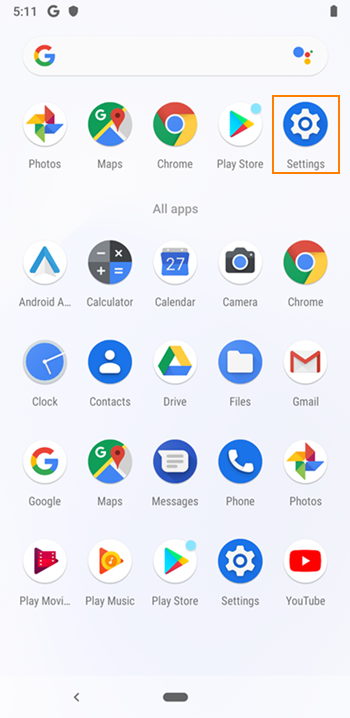
2. Tap Accounts, then Add Account.
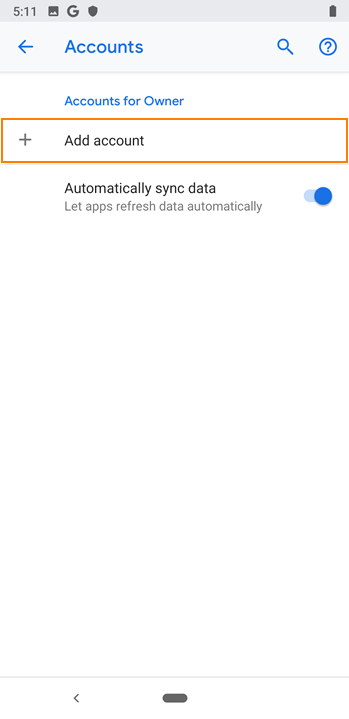
3. Choose Exchange.

4. Type in your primary email address and your password.
5. Type in the server settings. You can find all the settings here:
- Administrators:CONTROL PANEL > Home > ActiveSync
- Users:My Services > ActiveSync. Read the Knowledge Base article for more information.
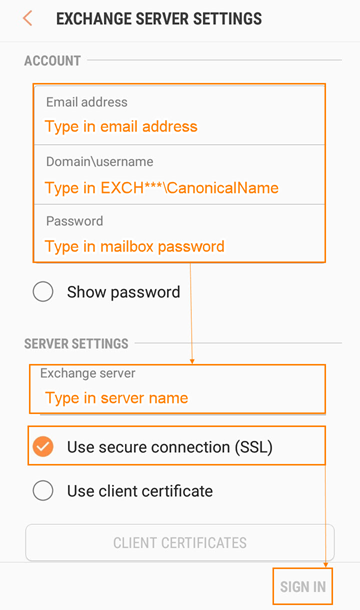
- Domain\Username: EXCH***\CanonicalName
- Password: mailbox password
- Server name: Type in the Exchange Proxy Server. You can find the server address in CONTROL PANEL > Services > Mailboxes > Mobile > ActiveSync
- Port: 443
- Security type: SSL/TLS
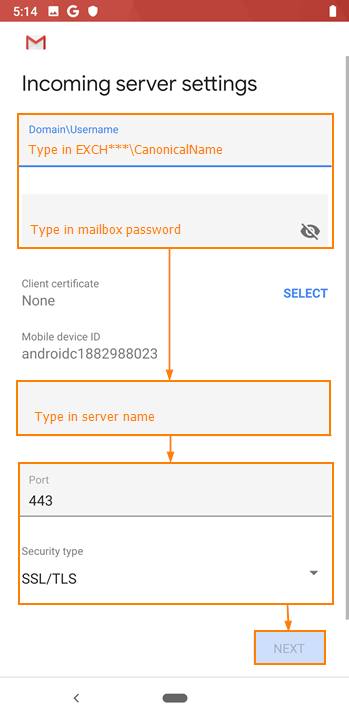
6. Click Next
- Use Secure connection (SSL): checked

6. Click Next
7. Accept the security prompt.
Galaxy s8
- Select Samsung from the Home Screen of your Andriod device
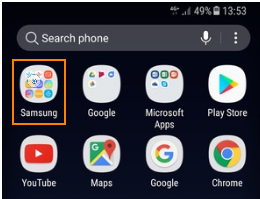
2. Select Email from the App list
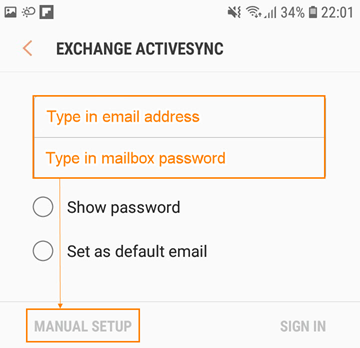
3. Enter your Email address and Password. Select manual setup.
4. Select Microsoft Exchange ActiveSync
5. Enter Username and Exchange Server address. Select sign in

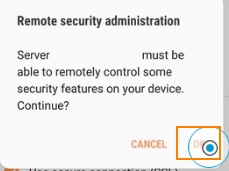
6. Select ok for your organization to remotely manage your device
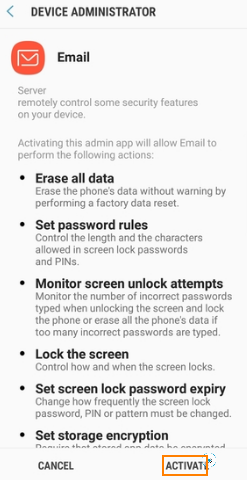
7. Select Activate
8. Your email is now ready to be used on your device